|
|
主题: 【sparth的作画过程典藏】
|

qinmenfei12
职务:普通成员
等级:2
金币:3.0
发贴:539
|
#12004/12/17 10:16:46
sparth,全名Nicolas Sparth Bouvier,法国人.现在任职于 Ubi Soft,游戏角色设计. (奇怪的倒是zuzu......这人可是sijun里与spooge demon并驾的人物吖,汝倒没怎的提起过他....sijun里也没留意到汝跟之交流....) perso.wanadoo.fr/arth/home.htm这是他的旧主页,新那个加拿大(在那工作现在)www.sparth.com晚上比较易进. 下面的过程请大家先把图片下了,跟着用幻灯片播放,作者本身是没文字说明的,就是这个原因.我自己也临摹过,如大家有问题的请提出,理论我想我还是能充充的. process 01 - hidden industryTutorial page for the "hidden industry" picture. Ten steps where i have tried to describe the way i work. STEP 01 this is the first sketch i did on the wacom. no other drawings necessary. major dark blocks. the background cavern is already quite there, but remains voluntarily brighter than the first closer area. the dark squarish areas on the buildings are just reminders of tones i'd like to obtain later on. no opacity on the background. 步骤1 这是用数位板画的第一张速写,也没再画其他参考草稿. 先填充主要的大块暗色区域.背景洞窟是留空而成 ,比靠前一点的区域都亮.而建筑物上的块状暗色是暗示稍后将要用到的色调. 图片如下:  STEP 02 defining the foreground : adding details, and orange lighting under the main building, hanging cables... docks added on the water. 步骤2 开始定义前景:添加一些细节,主建筑物下面的橘黄照明,悬挂的电缆....还有在水面加入了船坞. 图片如下: 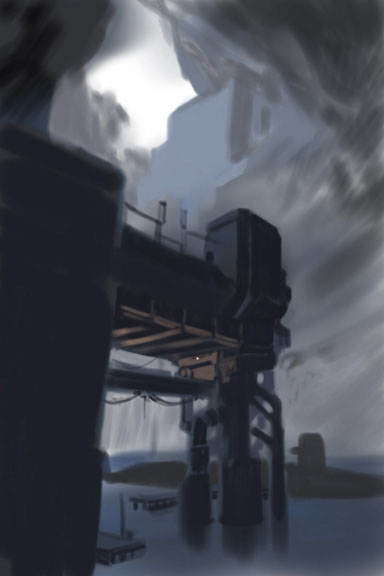
编辑历史:[此帖最近一次被 qinmenfei12 编辑过(编辑时间:2004-12-20 17:10:22)]
|
qinmenfei12
职务:普通成员
等级:2
金币:3.0
发贴:539
|
#22004/12/17 10:20:09
STEP 03 defining the background. it is really too dark and too detailed for my taste, but i'll push it away later by adding brightness. i feel logical to paint the background with cold blue tones, not only because of the sky opening, but also in order to keep the action and interest of the picture on the foreground. 步骤3 定义背景:觉得背景建筑物部分有点偏暗及细节太多,稍后要增加亮度.至于用色,用了蓝色的冷调,这是合乎逻辑的做法,不仅仅因为朝天洞穴的光线偏冷,更是为了对比,以突出前景. 图片如下: 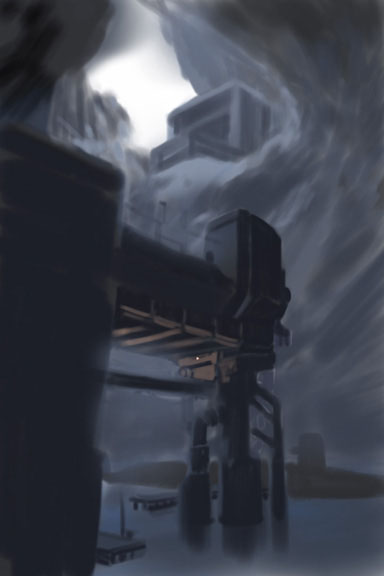
编辑历史:[此帖最近一次被 qinmenfei12 编辑过(编辑时间:2004-12-20 16:16:34)]
|
qinmenfei12
职务:普通成员
等级:2
金币:3.0
发贴:539
|
#32004/12/17 10:20:46
STEP 04 decided to make the background building even more detailed than what i expected. quite dangerous for the image balance, i will have to hide it later on. i'm beginning to paint the sky and the cavern with more opacity. 步骤4 决定在背景建筑物添加比预想要多的细节.处理不好的话会影响到画面构图的平衡.稍后必须抹掉多余的东西.并加大画笔的不透明度来细化天空,洞窟. 图片如下: 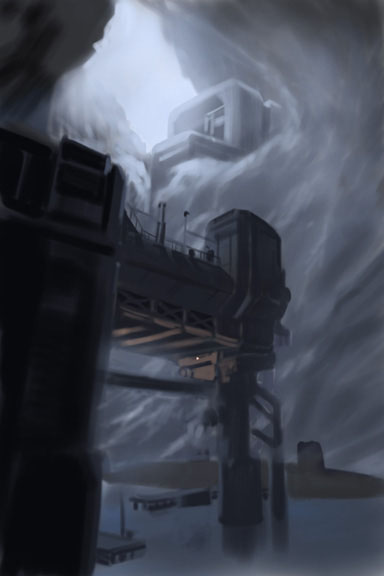
编辑历史:[此帖最近一次被 qinmenfei12 编辑过(编辑时间:2004-12-20 16:24:24)]
|
qinmenfei12
职务:普通成员
等级:2
金币:3.0
发贴:539
|
#42004/12/17 10:24:18
STEP 05 minor step. i just need to reassure myself by adding temporary lights here and there. i'll keep the lights on a layer during all the process. 步骤5 次要的一步,作为调剂.这里那里的添上临时灯光,都画在单独的一个图层上哦. 图片如下: 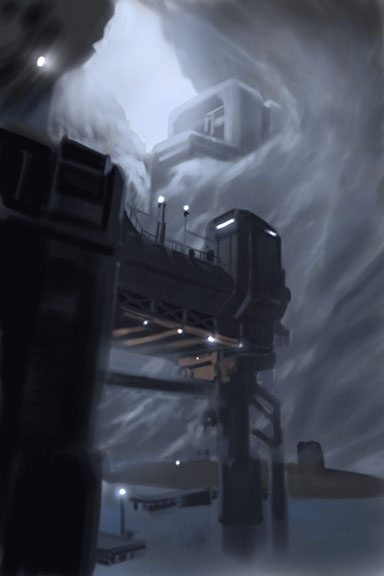 STEP 06 this is the "detail" process. concentrating on adding realistic touches here and there. probably the longest and most rewarding step. i leave the background for now, working on the middle of the image, and leaving the rest for later on. 步骤6 这是"详述"的步骤.将注意力集中在增加各处的真实感上.可能是最耗时但亦最得到满足感的一步了.把背景和其他部分留到后面,集中处理中景部分. 图片如下: 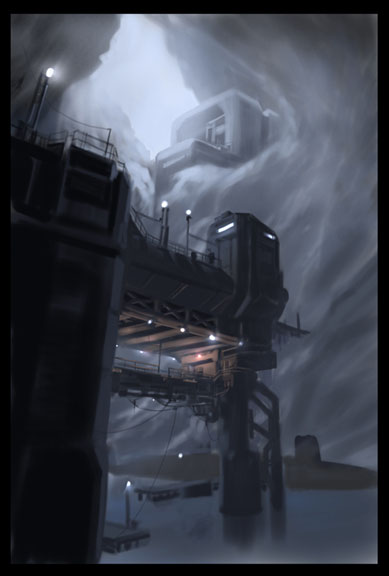
编辑历史:[此帖最近一次被 qinmenfei12 编辑过(编辑时间:2004-12-20 16:35:40)]
|
qinmenfei12
职务:普通成员
等级:2
金币:3.0
发贴:539
|
#52004/12/17 10:26:27
STEP 07 the "background" stage. important stage : with the help of color dodge, i try to make the cavern even wider and brighter than it is, in order to separate it from the foreground building. the main idea is to give a realistic distance to the background. before doing so, i worked on the rocks in order to remove that airbrush feeling that we could perceive on ealier steps, upper right. 步骤7 轮到处理"背景"阶段,很重要的一步:为了使作为背景的洞穴与前景部分分离,以增加其真实的距离感,使用了 color dodge(此为何物?我的ps是中文版,好象是个图层模式吧)让洞穴看起来要更宽更亮.在这之前还得消除画岩石时留下的喷笔痕迹. 图片如下: 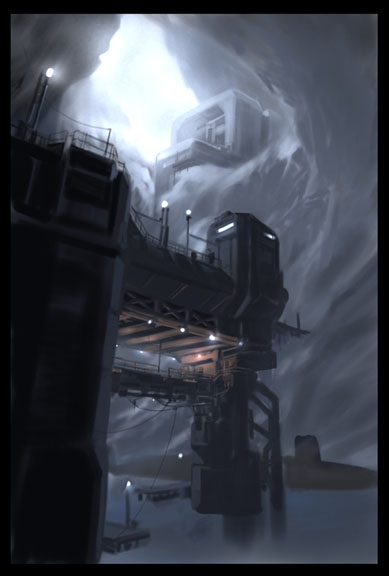 STEP 08 finishing ground and liquids. warm tones, in order to make a link between the building and the lower water. this way, all the foreground becomes warm. 步骤8 完成地上及水面部分,因为灯光的关系使用暖色调,将建筑物与水面之间的空间联系起来. 图片如下: 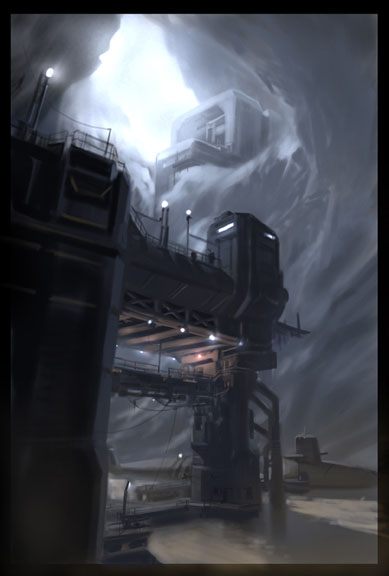 STEP 09 Painting process is over. the background has been flattened a bit with the use of the linear gradient tool : blue layers that i erase on the foreground. i'm satisfied now with the difference between the two main areas. 步骤9 作画过程结束,开始调整各部分层次关系.增加了一个半透明的蓝色渐变图层,使前,背景的层次更加分明. 图片如下: 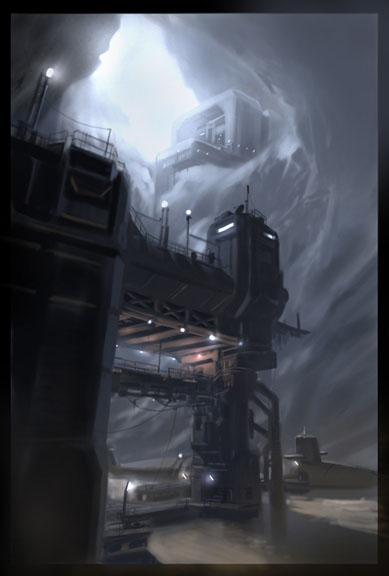 STEP 10 步骤10 添加最后的高光.用 watercolor牌滤镜做出灯的光晕 . sparth在两天里用了大约7个小时完成这幅作品,说是已经很快了比起他另外的那些. the very last touches. duplicated the main layer in order to add the "watercolor" filter in some areas. especially in order to force some contrasts. removed the filter effect on all the light halos. i finished the picture in approximately 7 hours. during a period of two days. a fast drawing indeed, compared to some of my other works. 图片如下: 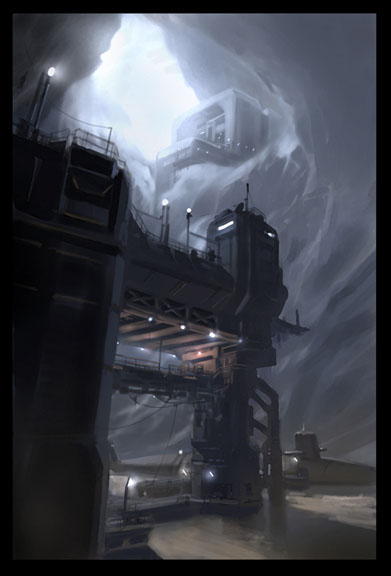 请大家留意红笔标住的点击数...... 图片如下: 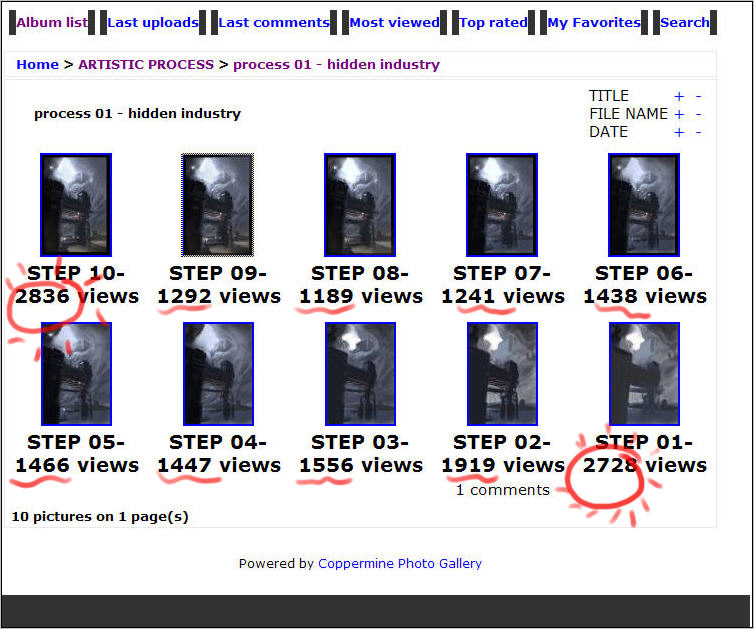 就这个教程有注解了(我迟些翻译),下面3个就两句.
编辑历史:[此帖最近一次被 qinmenfei12 编辑过(编辑时间:2004-12-20 20:17:06)]
|

zhuzhu
职务:版主
等级:9
金币:91.3
发贴:22562
|
#62004/12/17 10:26:39
配合的说明文字没有?标题也太简单了…… 
|
qinmenfei12
职务:普通成员
等级:2
金币:3.0
发贴:539
|
#72004/12/17 10:30:10
process 02 - come with us
A pretty weird tutorial of this space opera "come with us" artwork. I have added a few comments about the process, quite complex to explain, but i guess the images speak for themselves ...
下面将介绍这幅太空探险题材作品有点怪异的创作过程.单单语言很难解释清楚呢,但这么多图片应该能....
STEP 1 .i was thinking, for a few days, that the best idea concerning this tutorial would have been to explain the steps, one by one, the conventional way. but after a while i realised that there was probably not much to talk about, as the major interest of the image can be found in the three first steps. afterwards, it is just a matter of fixing details, and working very simply on the image, in order to bring more visual elements to the piece, giving a more realistic aspect to the whole thing. more to read "here" (用第一人称来译):曾经在一段日子里我都在思考这个问题----如何才能更好地表达绘画教程----常规的一步一步配上注解,图析作画步骤?!...但不久我便认识到,可能没需要,去花费那么多唇舌解释-------归纳起来,作画开始的头三步其实就是画面构思的成型阶段,即思维最兴奋活跃的阶段.在那之后无非都是添加修改细节的过程,引入更多的视觉元素,增强画面的真实感. 图片如下:  STEP 2 in order to begin from a piece with a bit more contrasts, i decided to grab an image i had previously done. not for the image itself, but only for the black areas that could help me find interesting rythms for a new composition. weird process, but it is worth it. also, i never use aything else than created materials done by myself. the image has been added in overrlay. 为了从一开始就有更多的对比元素(激发想象),我决定在之前画的一幅作品上开始这次的作画.不要以为是重复同一件作品,仅仅是用之来激发新的构图创作.古怪的念头,不是吗?但确实如此.我把它当作自己已创作的材料来使用而已(第2页那4张图的教程也是基于同一理念).下面我就不知到怎么"翻译"了----我不知道大家想要什么  图片如下: 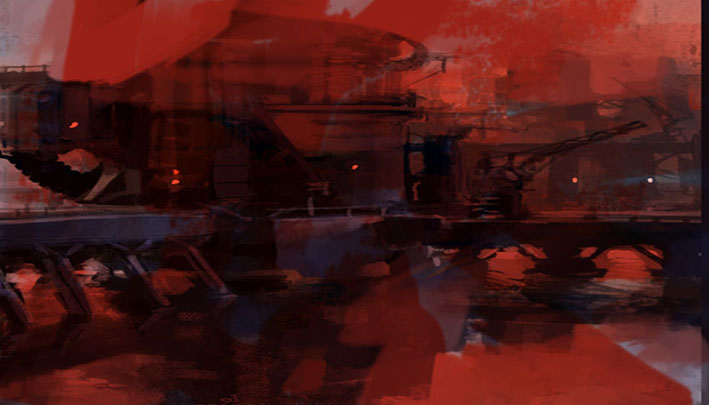 STEP 3 nothing more than a desertic landscape! 图片如下: 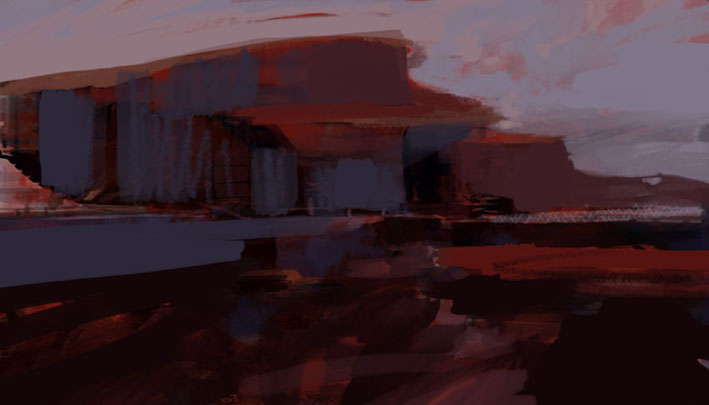 图片如下:  图片如下: 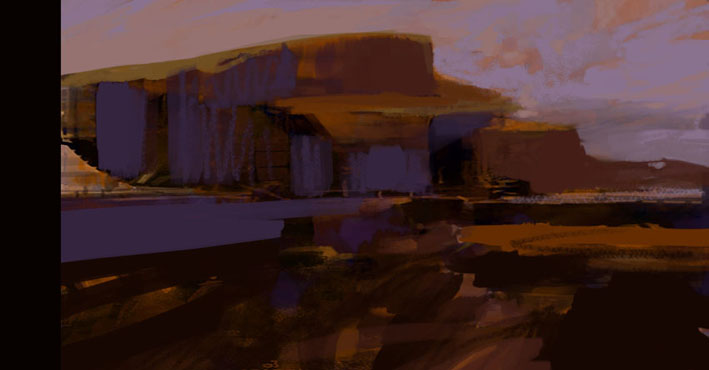
编辑历史:[此帖最近一次被 qinmenfei12 编辑过(编辑时间:2004-12-20 22:31:04)]
|
qinmenfei12
职务:普通成员
等级:2
金币:3.0
发贴:539
|
#82004/12/17 10:31:33
图片如下: 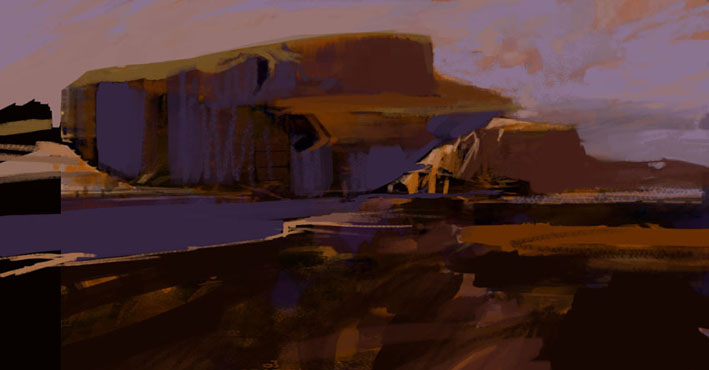 图片如下: 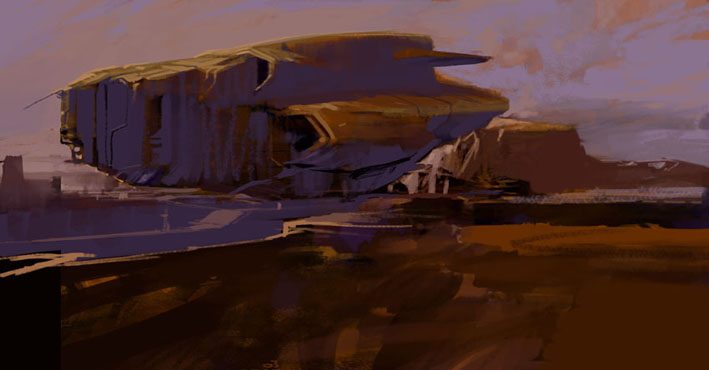 图片如下: 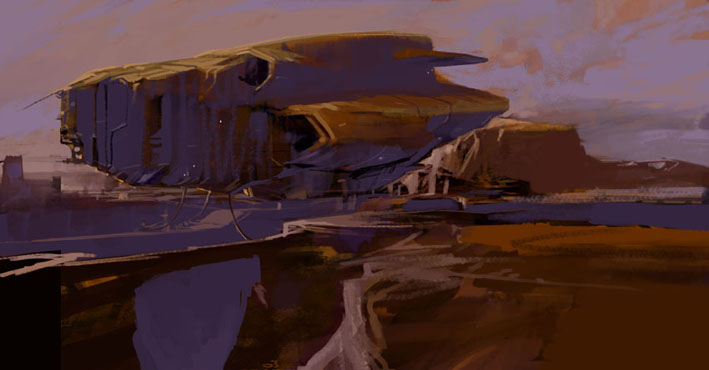 图片如下: 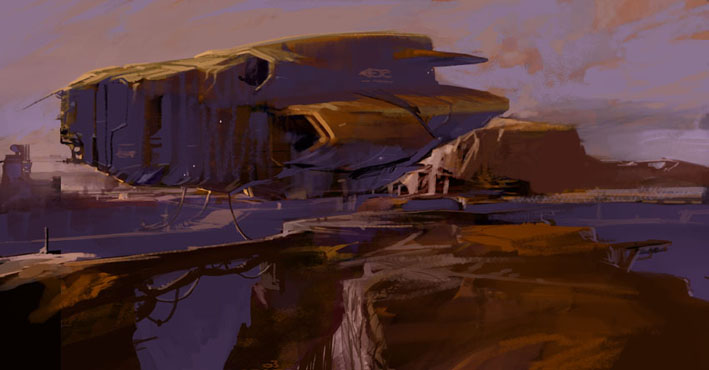 图片如下: 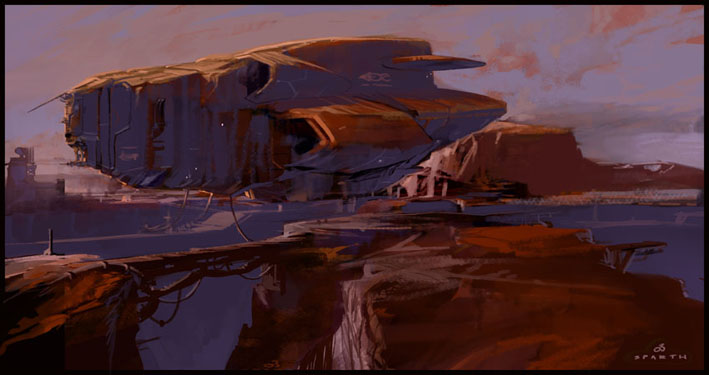
|
qinmenfei12
职务:普通成员
等级:2
金币:3.0
发贴:539
|
#92004/12/17 10:33:40
图片如下:  图片如下: 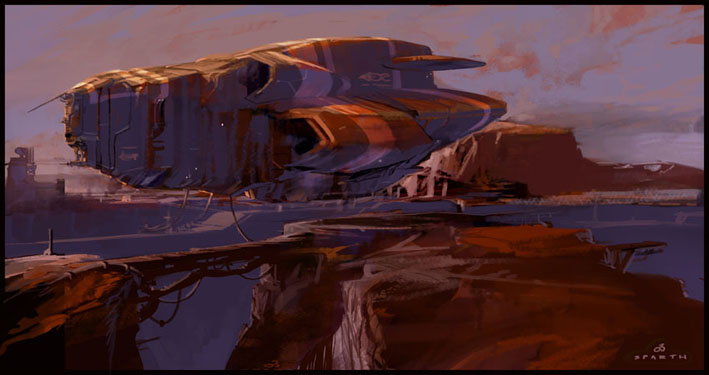 图片如下: 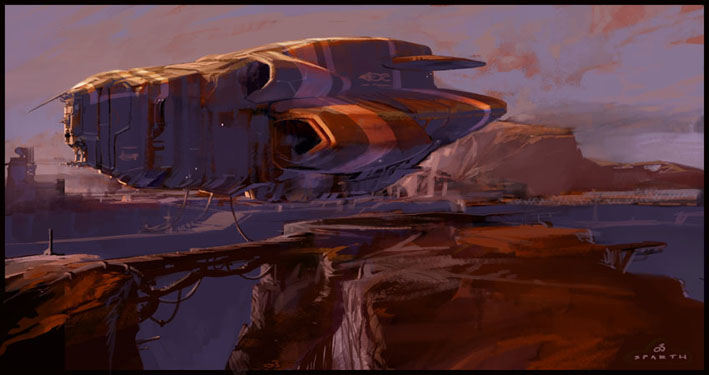 图片如下: 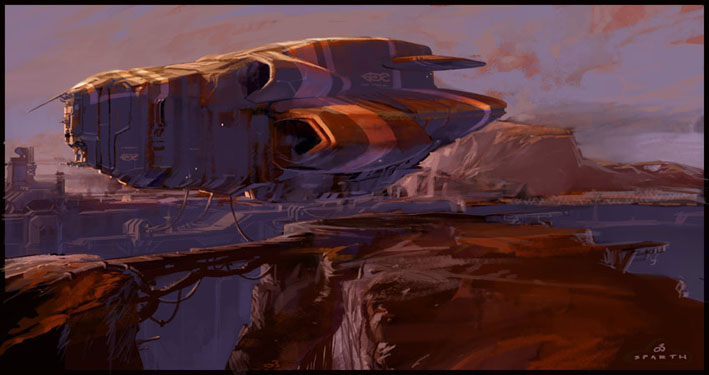 图片如下: 
|
qinmenfei12
职务:普通成员
等级:2
金币:3.0
发贴:539
|
#102004/12/17 10:34:55
图片如下: 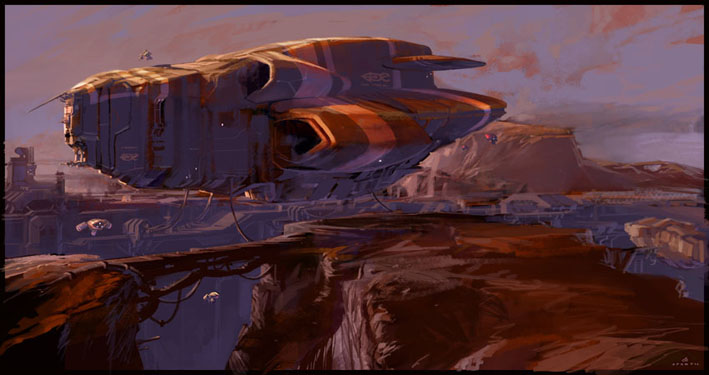 图片如下:  图片如下: 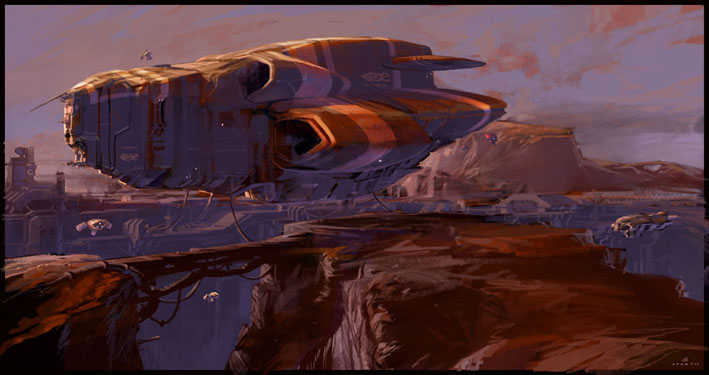 STEP 19 final image. completed in three days, a bunch of hours have been dedicated to the details. it was a very exiting work. 完成图.用了3天.其中大量的时间花费在细节上.但作画过程令人兴奋!  图片如下: 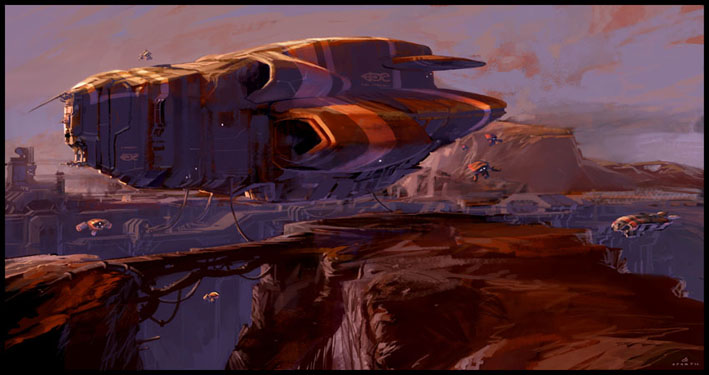 图片如下: 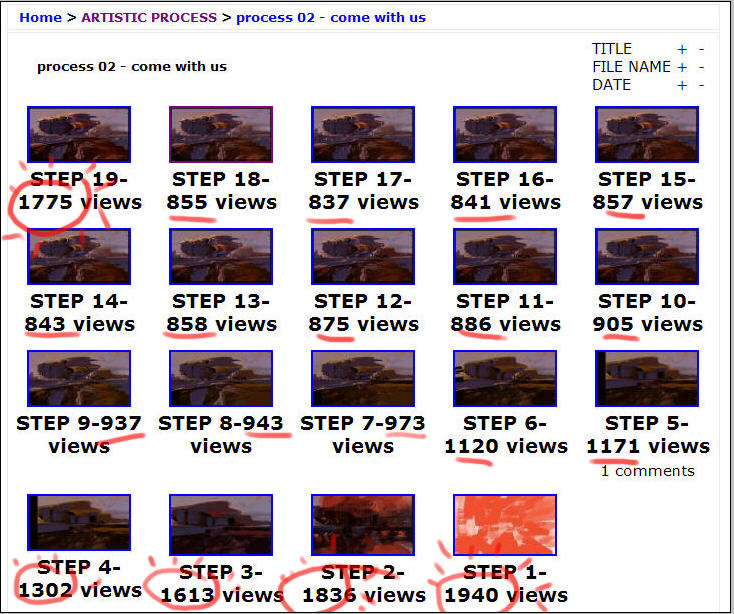
编辑历史:[此帖最近一次被 qinmenfei12 编辑过(编辑时间:2004-12-20 20:23:19)]
|
qinmenfei12
职务:普通成员
等级:2
金币:3.0
发贴:539
|
#112004/12/17 10:37:52
process 03 - phc double book cover
16 pictures, last one added on May 18, 2004 step 01 it all started with a blob.... or let's call it a spaceship. 步骤1 所有一切都始于这个斑点,咳咳,或者我们叫它做....一艘 宇宙飞船吧 翻译 完(真的没了) 图片如下: 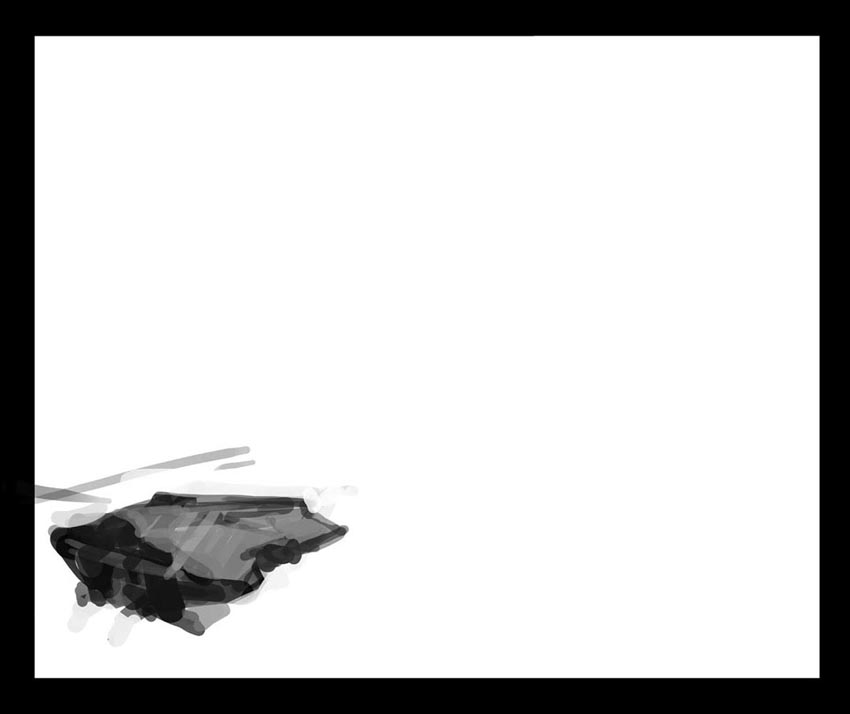 图片如下: 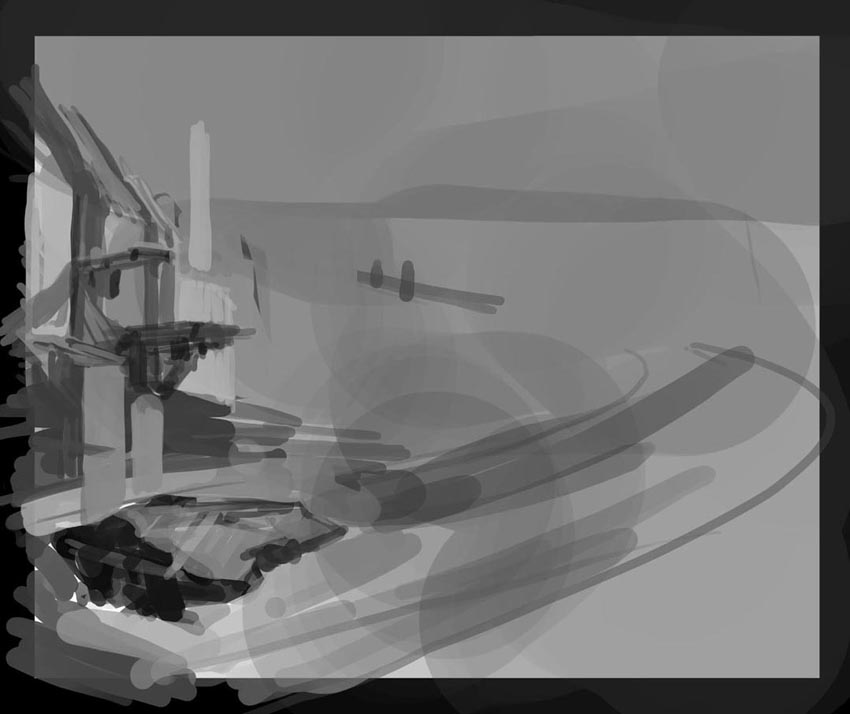 图片如下: 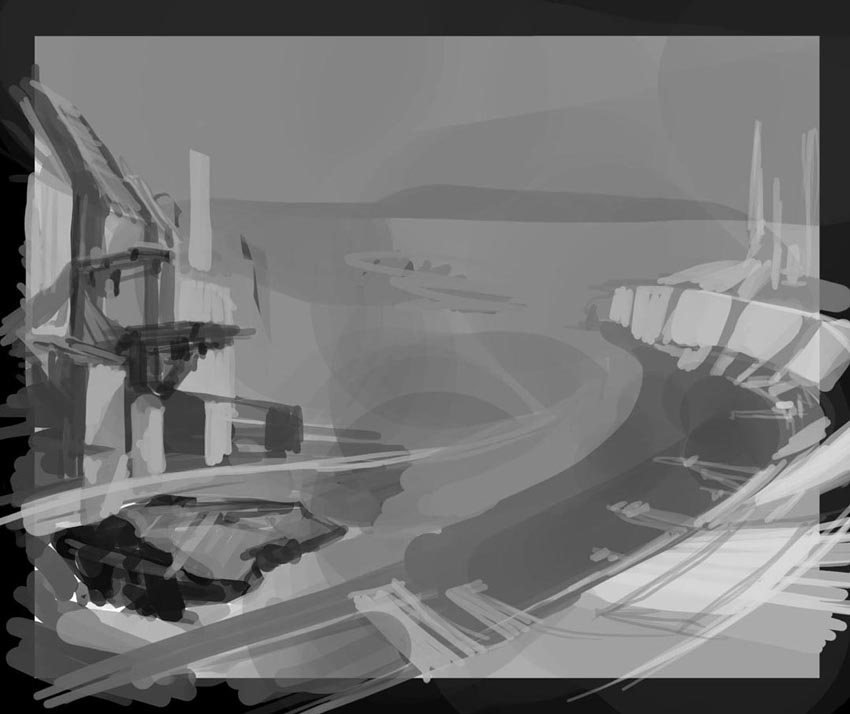 图片如下: 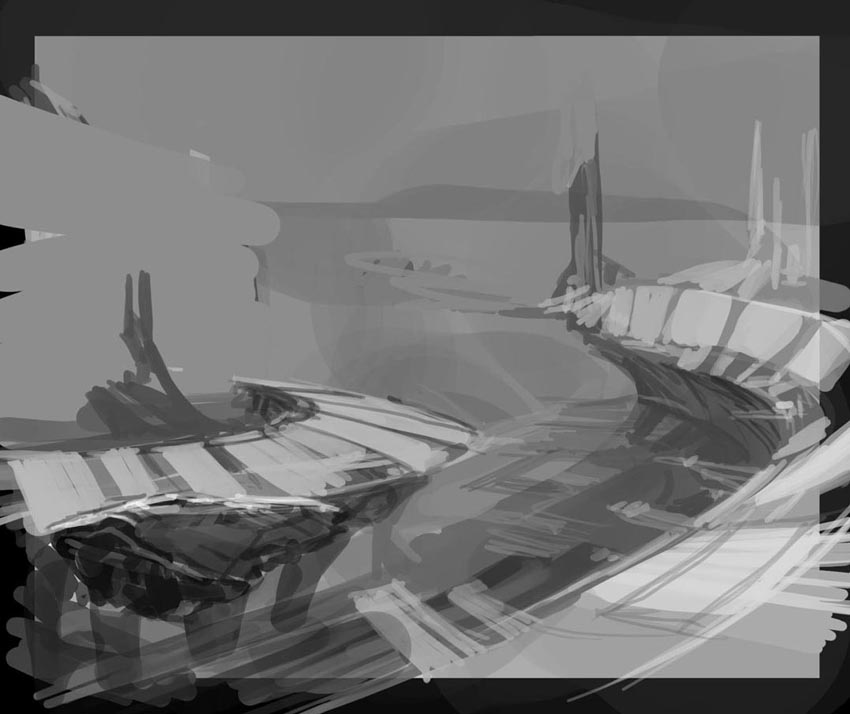 图片如下: 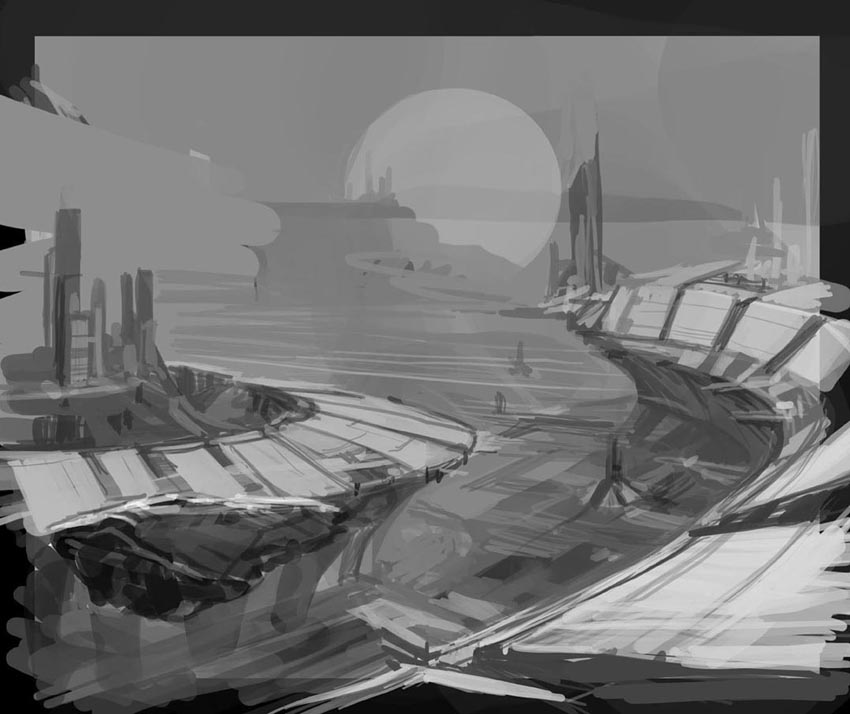
编辑历史:[此帖最近一次被 qinmenfei12 编辑过(编辑时间:2004-12-20 17:34:15)]
|
qinmenfei12
职务:普通成员
等级:2
金币:3.0
发贴:539
|
#122004/12/17 10:39:07
图片如下:  图片如下: 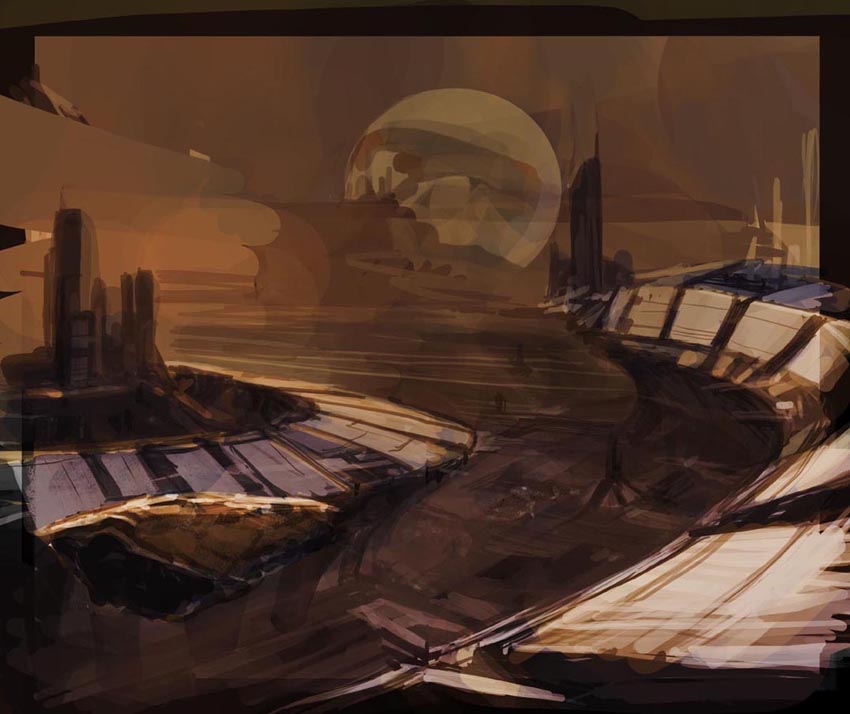 图片如下:  图片如下: 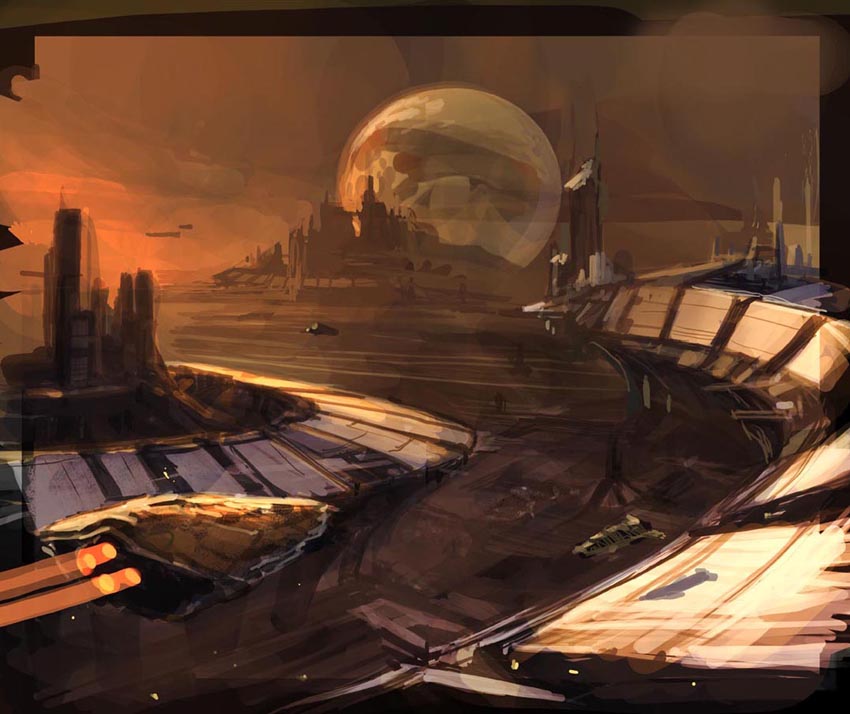 图片如下: 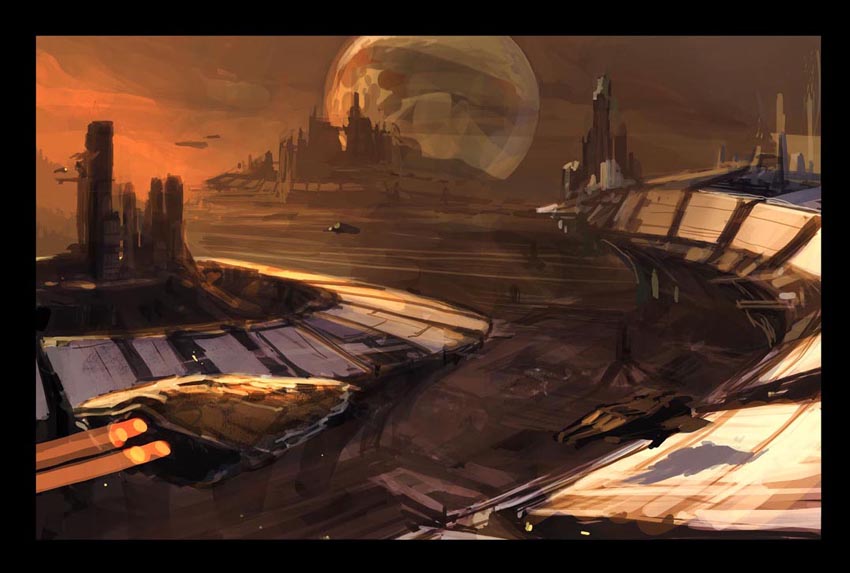
|
qinmenfei12
职务:普通成员
等级:2
金币:3.0
发贴:539
|
#132004/12/17 10:43:28
图片如下: 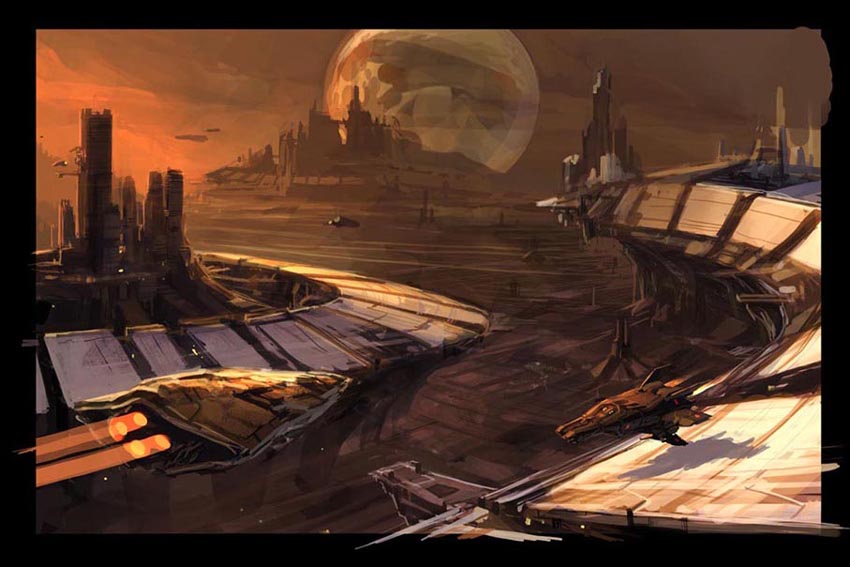 图片如下: 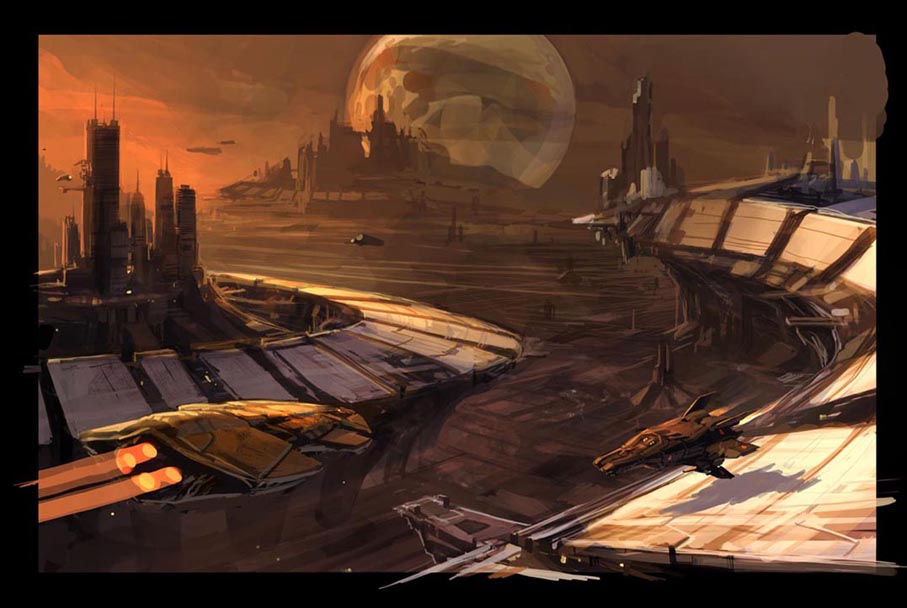 图片如下: 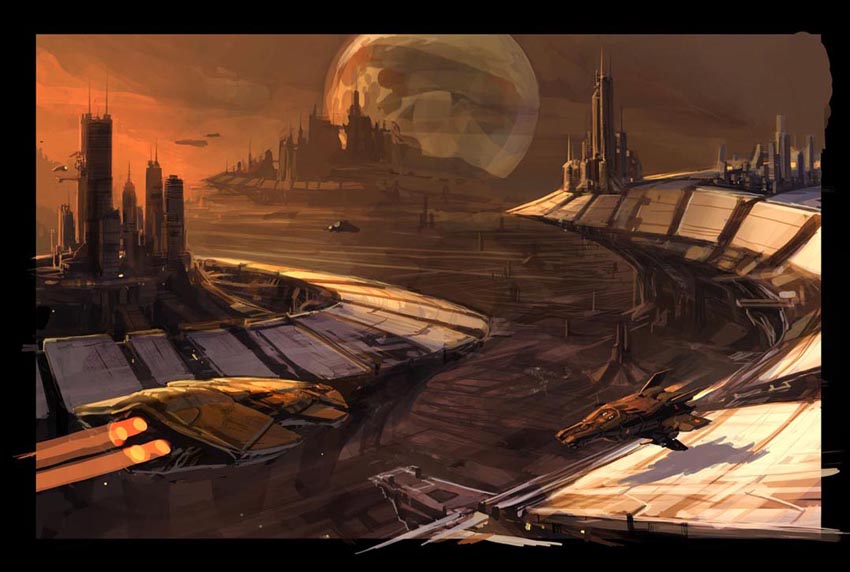 图片如下:  图片如下: 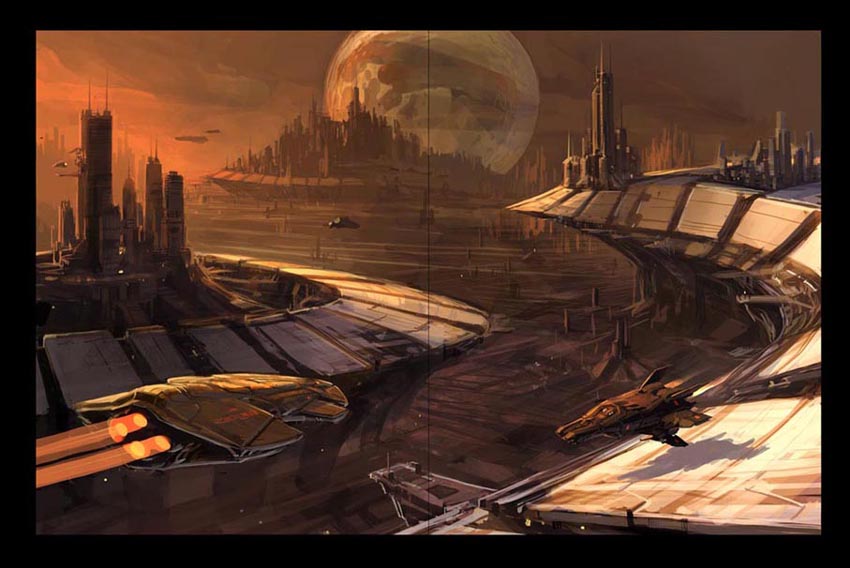
|
无敌精英流氓【罗刹】
职务:管理员
等级:9
金币:66.3
发贴:18999
|
#142004/12/17 10:47:28
靠!这个就TMD叫翻译教程?如果不补充文字,我立马就删贴~!
|
qinmenfei12
职务:普通成员
等级:2
金币:3.0
发贴:539
|
#152004/12/17 10:59:23
zuzu在上个帖子中说 引用:
靠!这个就TMD叫翻译教程?如果不补充文字,我立马就删贴~!
斑竹,我打字满啊!!!!!!!!给点时间行不行!!!!!!!  图片如下: 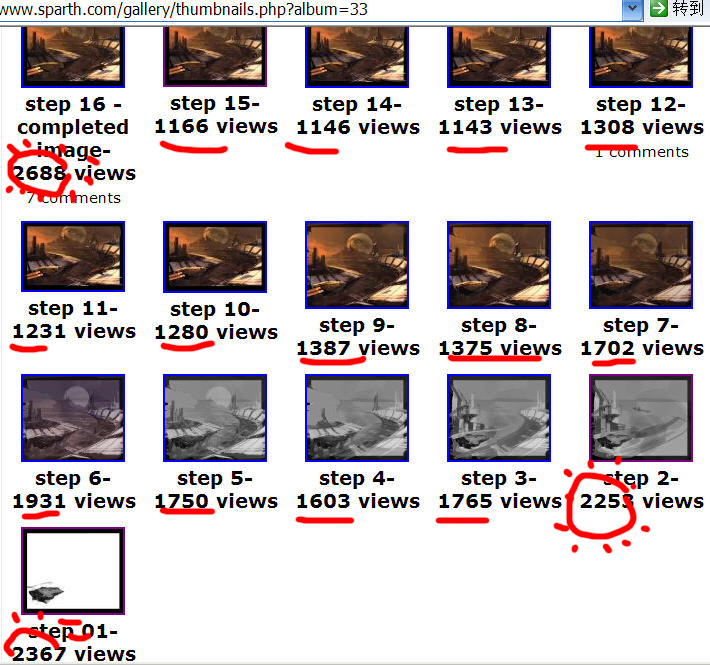
编辑历史:[此帖最近一次被 qinmenfei12 编辑过(编辑时间:2004-12-19 22:41:13)]
|


